Draw Mode (Wii)
This Article Contains Non-Canon Content! This page contains content that is not a part of the official canon. Drawn to Life: SpongeBob SquarePants Edition. Non-canon media includes; theories, fan art, speculation, or games published by developers other than 5th Cell or Digital Continue. |
| Draw Mode (Wii) | |
| Use | Draw Mode |
| Village Object | No |
| Retrieved | At The Start (Hero) After Creation Canvases Are Activated |
| Location | Creation Canvas Creation Hall (Redraws) Pause Menu (Redrawing the Hero) |
| Games | |


Not to be confused with canon games' Draw Mode.
Draw Mode is the main creative mode in Drawn to Life: The Next Chapter (Wii), consisting of many different tools and features like the rest of the series. Draw Mode automatically activates every time the player goes to edit or draw an object next to a Canvas, and create or edit the Hero at the start. Character creation also features 30 pre-made character templates - two of which are exclusive to the Raposa Sports mode, and three unlocked via an unknown cheat.
As this game was released on the Wii, rather than utilizing proper drawing controls like the canon games and Drawn to Life: SpongeBob SquarePants Edition, Draw Mode utilizes the Wiimote's pointer to determine where the cursor will draw on the screen. This was a point of criticism between critics and fans alike, as these controls made it harder to properly create something. Planet Moon Studios attempted to rectify this, however, with additional drawing features within both the mode itself and the stage gameplay via Action Drawing.
 Main Mode[edit]

The player can use a variety of different tools and palettes comprising of 18 colors for their creations. These include an adjustable brush, a standard paint bucket tool, an eraser (which is also affected by the size of the pen), an undo and redo button, a stamp tool, a resize meter, and a shape forming tool. When creating a Hero, the player is also able to utilize grid-based drawing by zooming in all the way, paste templates and move the placement of limbs.
Despite being limited to 18 colors, the player may unlock 8 more color palettes by finding them within levels and buying them from Isaac's Shop.
Tutorial:
Rather than help messages, this game's Draw Mode uses a standard tutorial to guide the player through all the tools in this mode.
DRAW TOOL
Welcome to the Drawing Tool! It is here that you will draw all the objects in the world to bring to life.
Drawing Arm
 For the best results while drawing, steady your drawing arm against something and hold the Wii Remote like this.
Canvas
 Use the outlines on the canvas as a guide for drawing the object.
Saving
Select ![]() when you are done. This will save your Drawing and exit the Drawing Editor.
when you are done. This will save your Drawing and exit the Drawing Editor.
Preview Window
 The preview window shows what your drawing will look like when it is bought to life!
 Zoom In
Use Zoom In to have a closer look at your drawing to add better detail.
Zoom Out
Use Zoom Out to get a better picture of the whole drawing.
 Draw Tools Tab
Select the Draw Tools tab to see the Drawing Brush options.
 Paint Brush
The Paint Brush button selects a rounded brush.
 Square Brush
The Square Brush button selects a square shaped brush.
Begin Drawing
Once you have selected the Brush you want, simply point the Wii Remote at the canvas and press  to begin drawing.
 Erase
Erase
The Erase button allows you to erase parts of the drawing using the Drawing Brush.
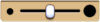 Adjust Scale
Use the Adjust Scale slider to change the size of the drawing brush.
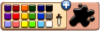 Color Picker
Use the Color Picker to change the current color you are drawing with.
Palette Swap
Select the + sign next to the Color Picker to change the current Color Palette you are using.
 Stamp Tool
Select the Stamp Tools tab to see the Stamp options.
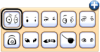 Adding Stamps

Once you have selected the Stamp you want, point the Wii Remote at the canvas and press to add the stamp to your drawing.
 Line Tools
Select the Line Tools tab to see the Line drawing options.
 Curved Lines
The Curved Lines button helps you draw curvy lines between two points.
 Straight Lines
The Straight Line button helps you draw a straight line between two points.
 Rectangle Button
The Rectangle Button helps you draw a rectangle based on where you place and drag the shape.
 Circle Button
The Circle Button helps you draw a circle based on where you place and drag the shape.
Shape Forming
Once you have selected the type of line you want, point the Wii Remote at the canvas to the right and hold to place and drag the shape.
 Fill Area Button
The Fill Area button allows you to completely fill an area with the selected color.
 Erase Area Button
The Erase Area button helps erase an entire area of a specific color. If you click on yellow, all yellow in that area will be erased.
 Fill Area
Once you select the Fill Tool you want, point the Wii Remote at the canvas and press to either Fill or Erase an area.
Trivia[edit]
- Unlike the first game, the colors on the drawing are not directly affected by switching the palette.
- The player can also still use the color chosen from the previous palette until they change it.
- This is the only Draw Mode in the entire Drawn to Life Series to have a shape-forming tool.
- This Draw Mode also has no Clear All button, instead an Erase Area button.
- There is no tutorial on adding templates, moving limbs or undoing/redoing a change.
- The Wiimote pointer's sensitivity for this Draw Mode is able to be altered to fit the player's ability; however, they can only access it through the pause menu, as there is no option to adjust it manually within Draw Mode itself.
 Media[edit]
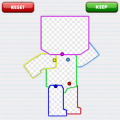
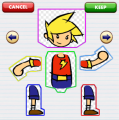
The screen for moving limbs.
The screen for selecting a template.


The Template Select button.

The Redo button.

The Undo button.

The Limb Adjust button.


A player changing Draw Mode's cursor sensitivity in the pause menu (Click to View)

The canvas used to activate Draw Mode.

The music that plays in the Draw Mode.

